 Front view
 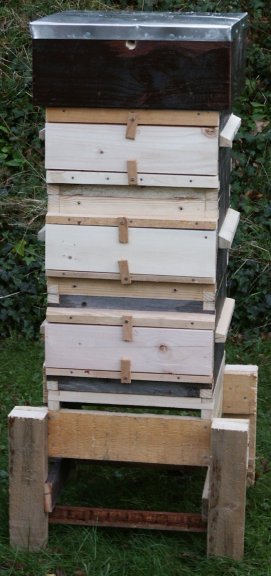 Rear view
Construction of my first Warrť hives
David Heaf
All the information needed to construct and manage Abbť Warrť's own hive is given in his book Beekeeping For All. His hive, comprising a minimum of three stacked boxes in spring, is designed for opening only once a year at the honey harvest. At the spring visit, boxes are merely inserted under the brood nest and so far as the bees are concerned this is hardly a hive opening as they appear to continue their work undisturbed and no heat is let out. However, with this extremely low frequency of intervention or interference, in Warrť's hive, the beekeeper has only the entrance activity to tell him what is going on inside. To provide more information, the hive was modified by Jean-Marie FrŤres to include a window across the entire back of each box. This modification is described in his book L'Apiculture Ecologique de A a Z, edited and illustrated by Jean-Claude Guillaume (1997). Details of the book and how to order it are at http://groups.google.fr/group/ruche-ecologique/.
Making the the original Warrť hive-body box involves a lot less time and cost compared with say a UK 'National' brood box and there is only one type of box to make, which serves for both brood and honey harvest. Furthermore the original Warrť box is merely butt-jointed and nailed. The finger jointing on the boxes shown here is unnecessarily robust and was dropped in favour of butt joints in later hives. The modified Warrť hive, i.e. with a window, is not as economical as the original and thus runs counter to one of Warrť's aims for the 'People's Hive', namely simplicity and cheapness. What is saved in not having to make the rebated, tenoned and bevelled bars of the 'National' brood box is probably cancelled out by the time and cost that goes into the rebates, tenons and glazing of the back of a modified Warrť box.
For the first batch of boxes (12) for a trial of the Warrť hive concept in Wales, the boxes were made with not only windows, but also interlocking (castellated) joints. All joints are glued with exterior grade woodworking adhesive. These are very time consuming to make. A second batch had half-jointing at the front with two rows of 50 mm galvanized nails at right-angles. Subsequent batches were windowless and butt-jointed with 65 mm galvanized nails, 7 to each joint.
The prototype illustrated here is made almost entirely of driftwood (washed ashore from the Irish Sea), some of which was already painted -- hence the 'castellated' corners. Before being deployed, all outer surfaces were painted with a suitable breathable exterior wood stain. For hot climates a white or light-coloured paint is advisable. Subsequently boxes were made of larch and finished with two coats of raw linseed oil.
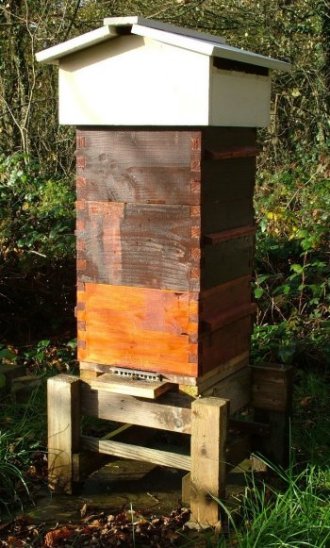
Front view Rear view
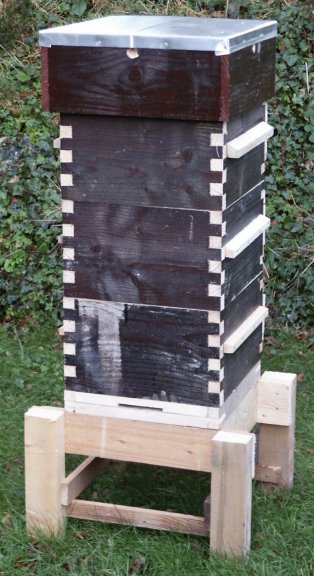
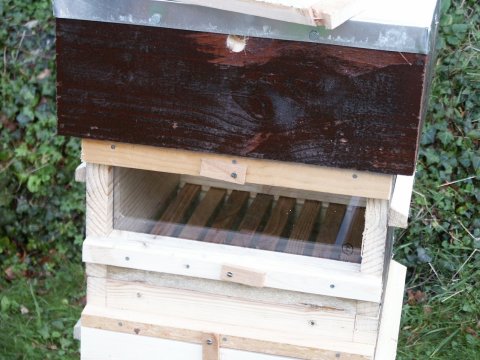
The pictures above show a complete hive with three comb chambers (hive-body boxes) with handles, a roof, an open-mesh floor and a stand. The last two items are not in Warrť's design.
An important addition to the FrŤres & Guillaume design is having open-mesh floors to monitor Varroa (the sample tray goes in the rear slot just above the stand). The Warrť floors most of the time as they are less draughty and the mesh floor temporarily substituted for monitoring Varroa. As can be seen from the rear view image above, another modification of FrŤres & Guillaume's hive is removal of the right and left battens of the shutter surround. The shutter runs the full width of the back.
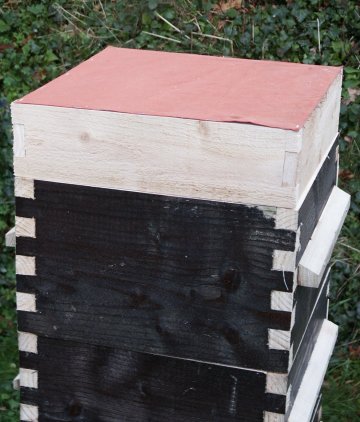
The rear view (right) shows the shutters covering the windows of the comb chambers. The roof, this design based on a UK 'National' hive roof, is ventilated on all four sides and covered with aluminium sheeting (for example, from a recycled caravan). The following two images show the quilt (100 mm deep) with the roof removed.
 Quilt normal
position
Quilt normal
position 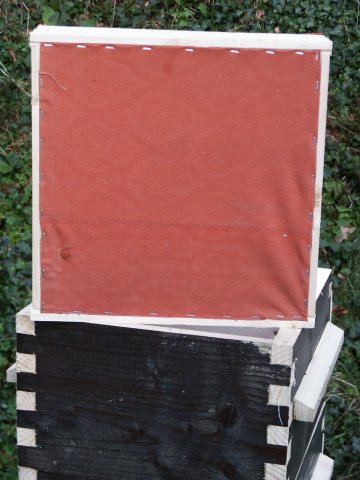 Quilt underside
The quilt -- an insulating, but vapour permeable box -- is slightly modified in this version in that the insulating material is polystyrene pieces (used in packaging) instead of straw or dried leaves. It is covered top and bottom by thick cotton canvas (closely woven hessian is also suitable). As there are no vents in the quilt, heat loss is minimized, yet vapour and gases can find their way through the two layers of cloth and amongst the intervening fragments of polystyrene. A solid polystyrene sheet would not be suitable here as it would present a significant barrier to moisture and air diffusion. Hives I made later have a quilt to Warrť specification: sackcloth fixed only underneath, fill of wood shavings (from an electric planer) and open at the top so the insulation can be turned over, and if necessary replaced.
Warrť recommends placing directly on the top bars a piece of coarse weave cloth such as jute sacking stiffened with flour paste. The bees propolise or unpropolise the holes in the weave to increase or reduce the amount of top ventilation. J-M FrŤres & J-C Guillaume suggest using a 'moustiquaire' (mosquito net). The advantage of this is that the cloth can be gently peeled off without upsetting the bees, whereas removing a crown board often involves cracking propolised joints which often agitates the bees.
 Top
bars
Top
bars
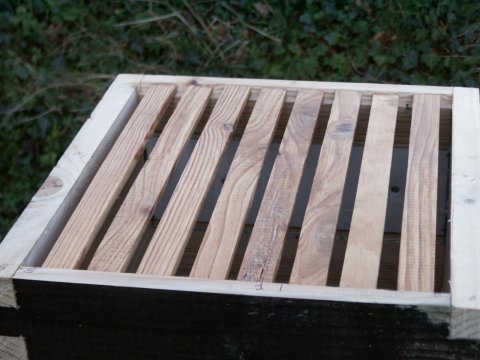
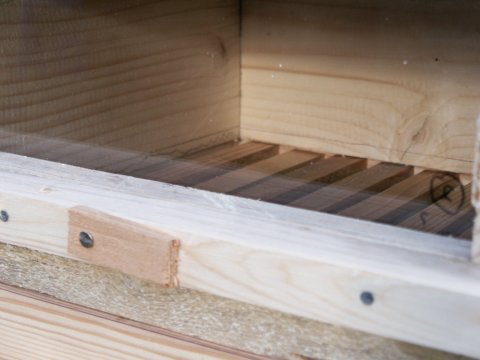
With the roof, quilt and cloth removed, the top bars are exposed (see above). Internally, the chamber is 300 mm square (floor plan) and 210 mm high. The walls should be at least 20mm thick; here they are 25 mm. Two 10 x 10 mm rebates support the top bars which are 24 x 9 x 320 mm at 36 mm centres, each with a 2 x 2 mm grove down the centre of the underside into which beeswax is poured to form a starter strip (Waxing top-bars). The 1 mm gap above the bars is essential for making removal the box above easier. The bars are held in place with one gimp pins (the same 20 x 1 mm lacquered pins as used for frames) at each end. Latterly, the heads of the pins are cut off before finishing hammering in. This eases removal of top-bars. All boxes have top-bars. The bars are rough sawn underneath to help comb adhesion, but above they are planed and coated with linseed oil to minimise comb adhesion from above.
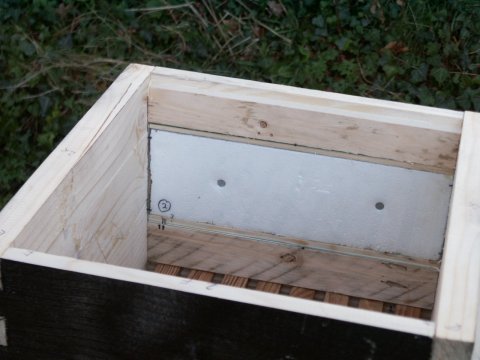
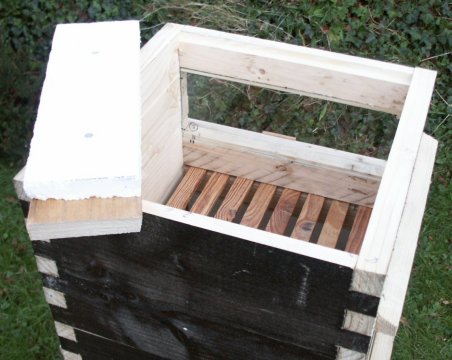
Above left: inside view of window; above right: window shutter opened
With the top bars of the top chamber removed (above), its window and the top bars of the next chamber down are visible. The window glass is 4 x 300 x 114 mm let into 4 x 7 mm rebates in the back bars and secured with gimp pins. The shutter comprises a piece of polystyrene 21 x 98 x 298 mm nailed to a wooden, 20 mm thick, outer cover. The right-hand image above shows the shutter removed. Note that the comb will align 'cold-way', i.e. with midrib planes at right angles to the front/back. However, if required, for wintering the boxes can be rotated 90 degrees so the comb lies 'warm-way'.
Scale drawing of cross-section of
window of modified Warrť hive.
The top and bottom window frame bars of this version are mortise and tenoned into the
side walls.
Above shows a detail of a window. The shutter is retained by two wooden latches, each secured by a stainless steel or brass screw, and mounted on 20 mm thick battens bevelled to shed water.
 Roof
inside
Roof
inside 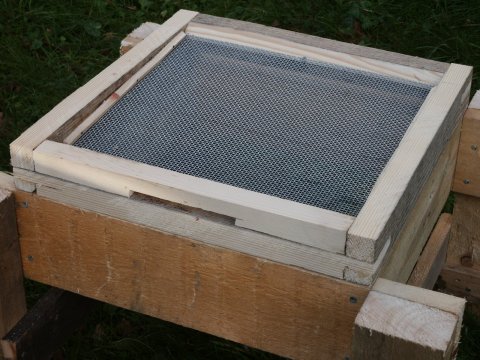 Mesh
floor
Mesh
floor

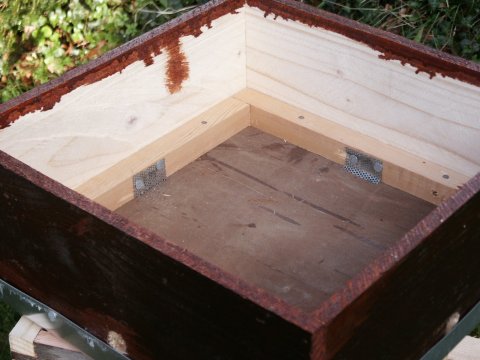
Original Warrť floor design (two pieces of fallen comb have been fixed to this used floor by the bees)
The inside view of the 'National' roof (above, left) shows all four vents. To make a vent, a hole is drilled from the outside, sloping upwards to prevent water seeping in, and emerges in the middle of the spacer battens which create a ventilated void space under the roof. The holes are closed on the inside with perforated zinc or other wasp/bee-proof material. This roof type has proved unproblematic with the Warrť hive. No condensation forms under it. In the UK climate, it is customary to place a brick on the roof of each hive. With the Warrť hive at exposed sites, particularly when four or more boxes are in place, two bricks are used.
The open-mesh floor (above right) is adapted from a design used by the author for National hive floors. In this case, woven galvanized metal mesh is used with 8 wires to the inch, although usually expanded galvanized steel is used (N6664F12502500, www.expandedmetalcompany.co.uk). The mesh slopes upwards to the rear of the hive and the part of the back bar projecting into the area accessible to bees is bevelled to allow debris to slide out through the mesh to the ground. The same applies to the beading at the edges. This floor is fitted with a 7 x 100 mm entrance. The entrance block can be removed when there is a nectar flow on. The 7 mm aperture is generally regarded as mouse-tight, but the author adds metal mouse guards in October, each with a row of 9 mm circular holes. The type shown in the image below is a modification of Warrť's combined mouse guard and robber guard. Here it is made from scrap aluminium angle, but it can easily be cut from a food can.
 3-box hive with Warrť roof
The illustration above shows a hive with a Warrť pattern roof ventilated under the eaves and gable solely to protect the hive from the sun. It contains a board to prevent mouse access to the quilt. This means that in Warrť's design there is little or no passage of air or moisture through the top of the quilt. It thus must contain hydrophilic material such as wood shavings etc. so that excess moisture can be absorbed. The quilt probably has a certain amount of moisture buffering properties.
As the footprint of the hive is smaller than many other hive designs, a firm base is required. I use a recycled paving slab and a 300 mm high stand with legs outside the four corners of the hive. But any kind of secure stand is suitable. It must be levelled with a spirit level to ensure that comb is built parallel to the sides. Levelling is greatly facilitated if the stand is on a firm base, such as a concrete slab. The levelling can then be readily completed with pieces of slate or other weatherproof shims. The author prefers stands that fit the hive footprint exactly, allowing easy water runoff, and providing a 100 mm skirt all round as extra draught protection below the Varroa floor, when used. The Varroa floor sample-tray is inserted only when sampling Varroa.
Warrť recommends having the hive entrance much closer to the ground so as to make it easy for laden foragers who miss the entrance to climb in. Bricks or blocks would suffice for this.
To David Heaf's Warrť hive experiment index page
To David Heaf's general Warrť beekeeping pages