Colony in a chimney in south Pwllheli
2 June 2011
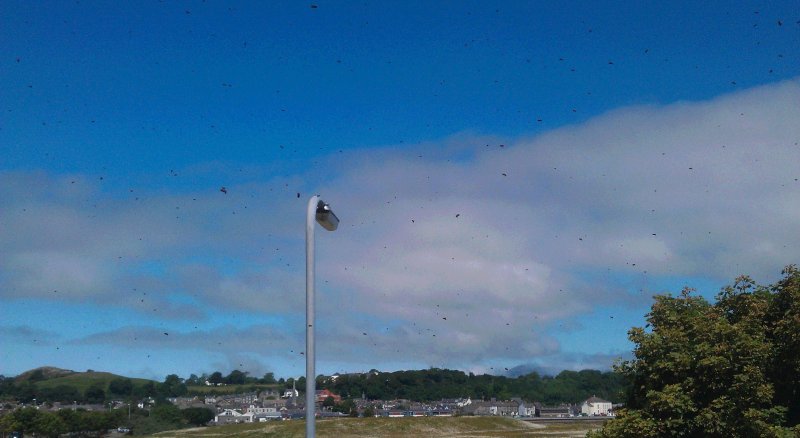
A swarm is seen arriving at the chimney. The tenants had seen bees there in the previous days and reported it to the landlord. Bees had been at the chimney the previous year.
5 June
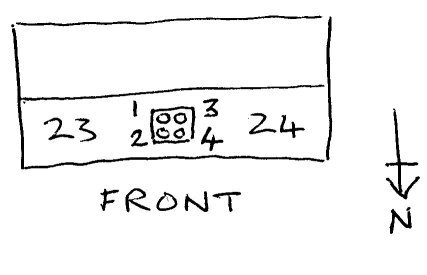
Honey bee colony confirmed. Colony entrance located in flue numbered 4 (see plan below) of the shared chimney stack of the properties numbered 23 and 24. Flues 1, 2 and 4 are disused.
From 2 June, the tenants on both sides had heard the sounds of bees coming from the blocked up fireplace vents in the rooms below.
9 June
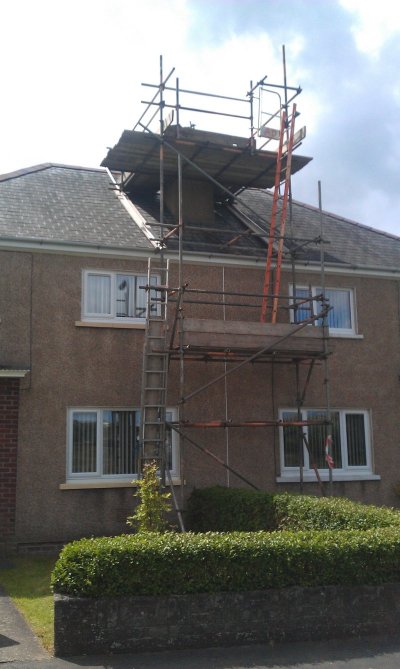
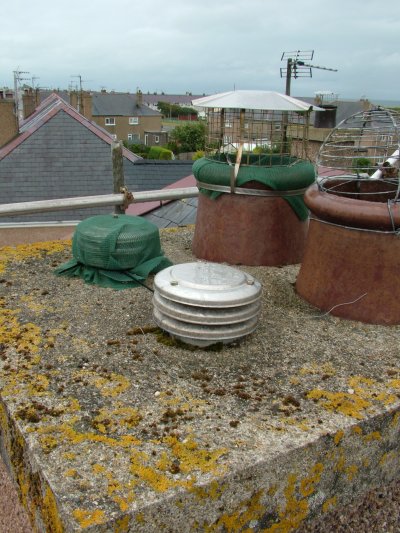
Scaffolding installed at the property.
10 June
Survey of access aperture to flue for colony removal.
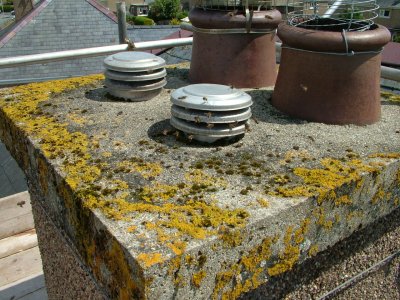
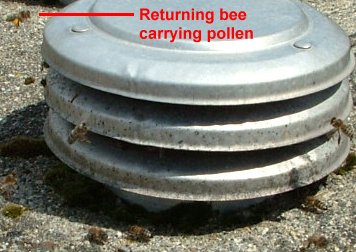
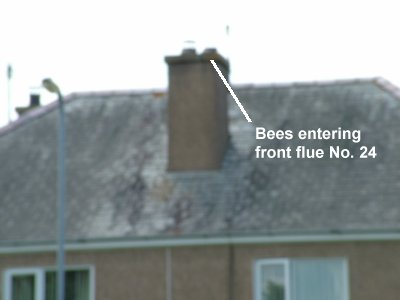
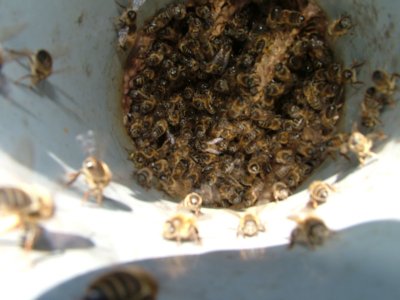
Above left: bees entering flue numbered 4 in the above plan. This is terminated with an aluminium cap. The foraging traffic was high, indicating a big colony. Plenty of pollen was seen coming in indicating the presence of a queen in lay.
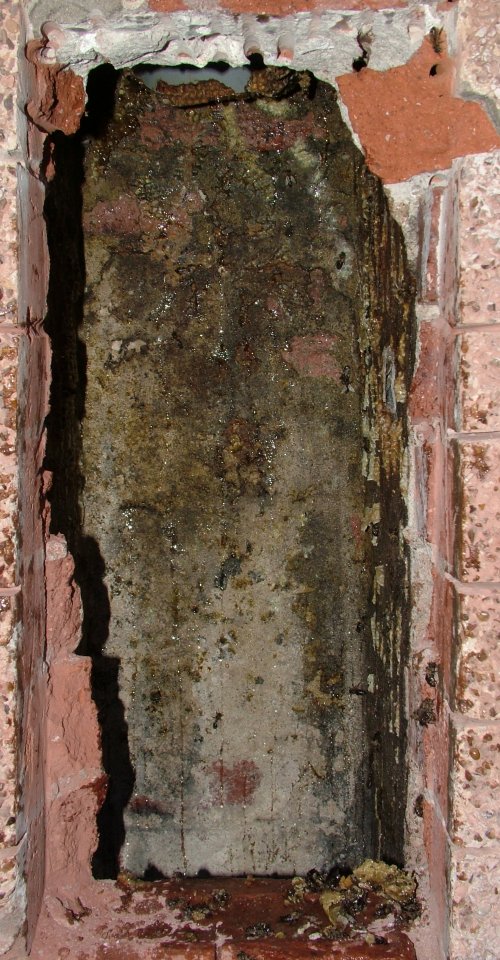
Sawed through the aluminium rivets on the cap and removed it to establish the position of the colony. The photo below shows the cap of flue 4 removed exposing a 100 mm (i.d.) uPVC plastic pipe round which is the base of the aluminium flue cap.
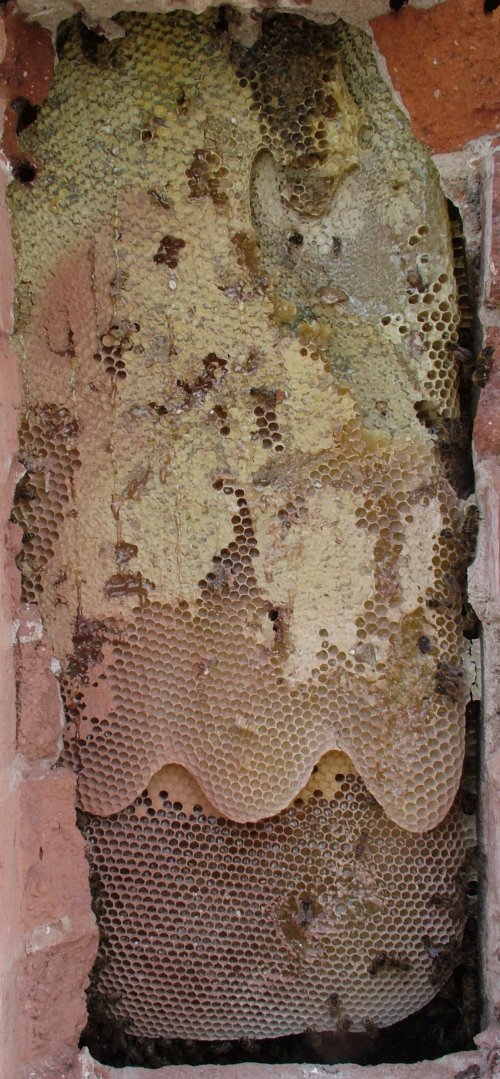
The photo below left shows the top of the comb of the nest. The comb is brown, confirming it was constructed at least a year previously. Two pollen carriers are visible in the foreground. The combs are hanging below the 130 mm concrete slab, fixed to its underside.
As the access to the main flue was too narrow an aperture through which to extract the colony, the cap was replaced temporarily, wired to the lugs on the cap base, which were first bent upwards to allow sufficient clearance for the the bees to enter and leave the flue.
16 July 2011
The landlord chose to have the bees removed live by means of a 'cutout'. For an explanation of a cutout, see 'Options for removal' below. A builder was commissioned to make a suitable hole in the side of the chimney.
Below: The flue was capped with a bee proof mesh to prevent guard bees hampering the work. The rendering was removed with the help of a diamond circular saw. The mortar joints were chased out with the saw.
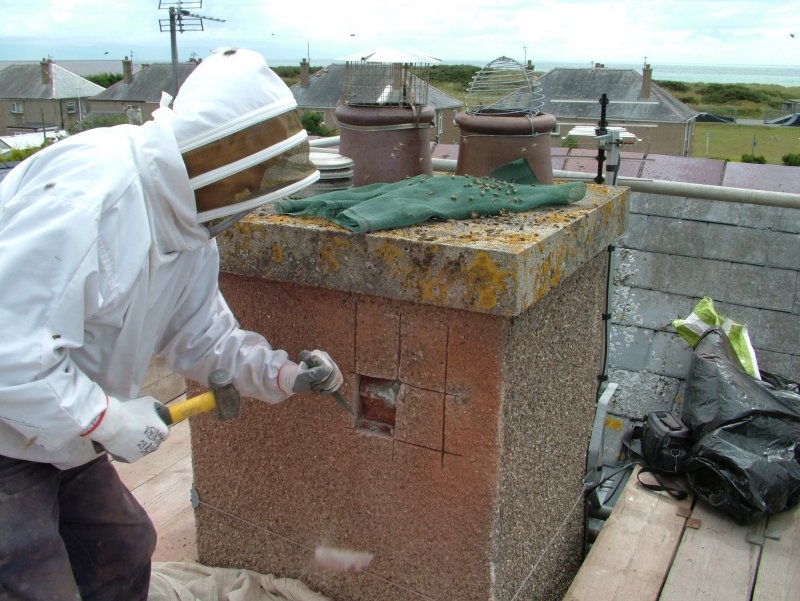
Further dismantling had to be done with care to avoid damaging the nest and dropping masonry to the bottom of the cavity.
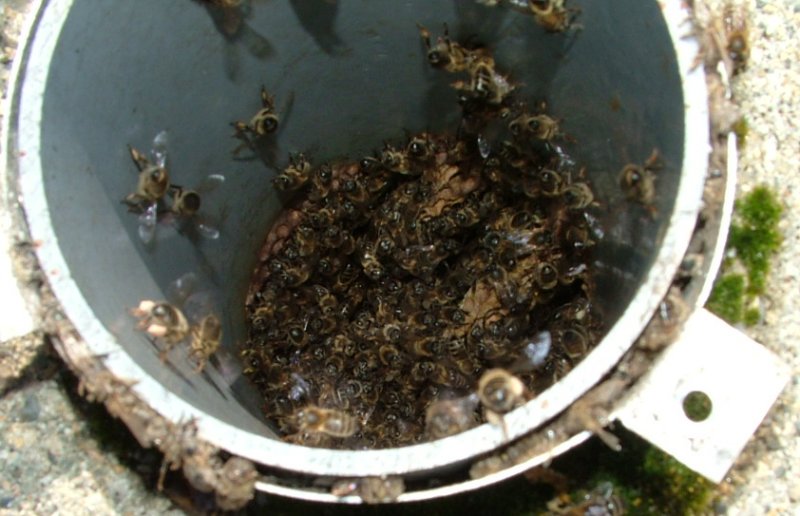
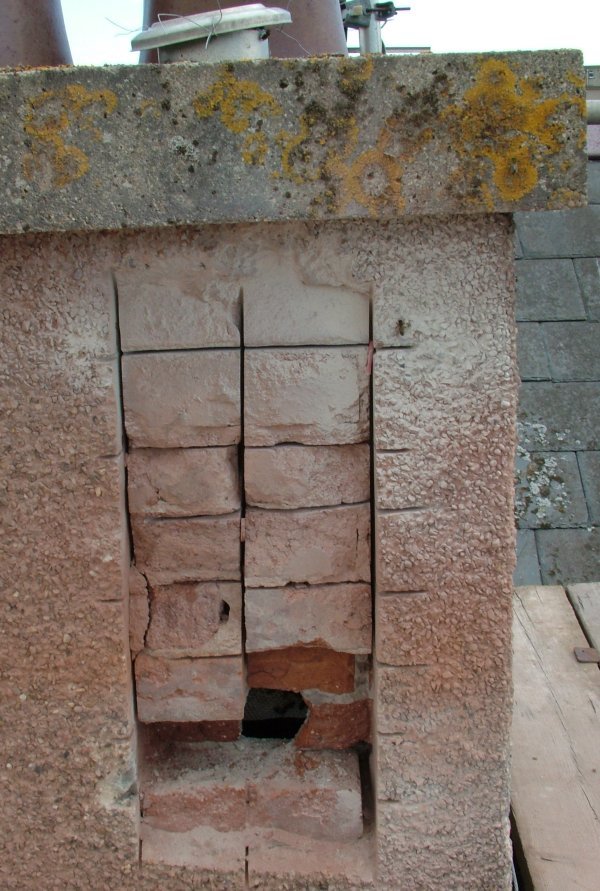
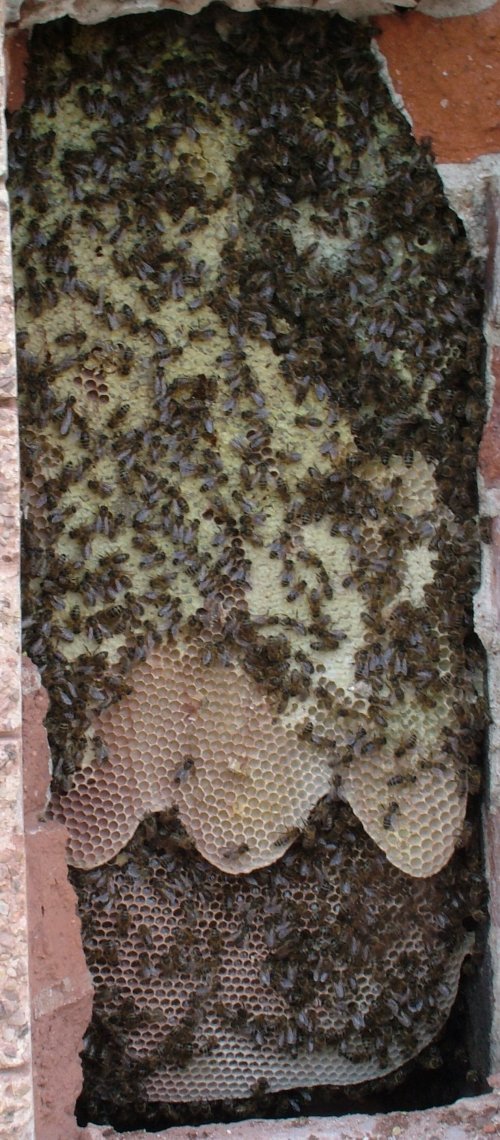
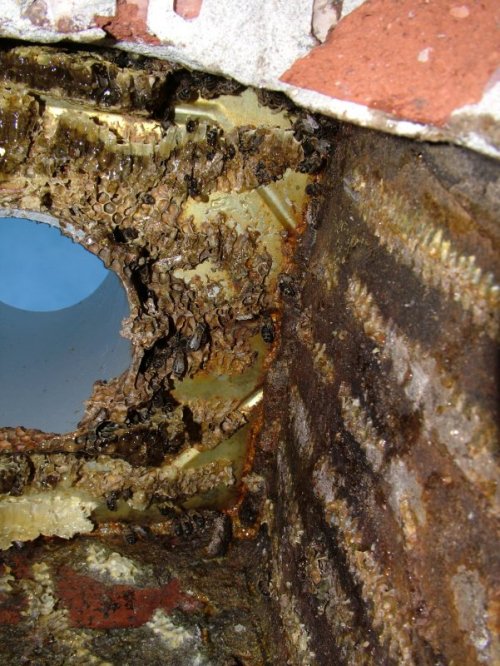
Below: Breakthrough! The bottom of the nest and a few bees are visible. It extended 630 mm below the chimney capping stone and filled the whole flue between those limits
Below left: When the brickwork was removed there were very few
bees on the outermost comb. It is possible that the hammering had driven them to the
opposite side of the flue.
Below right: The nest was left undisturbed for an hour and a half while further equipment
was fetched. During this period, bees moved back onto the outer combs.
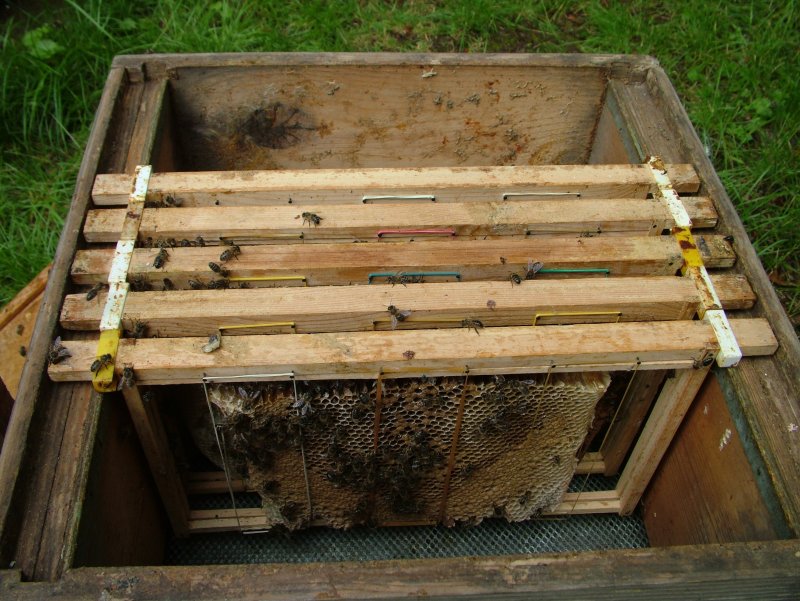
Brood combs with as many bees as possible were transferred to hive frames and secured with rubber bands. These frames were stored in a transport hive called a nucleus box. As the combs were removed bees were also drawn into a bee vacuum which takes almost all of them alive.
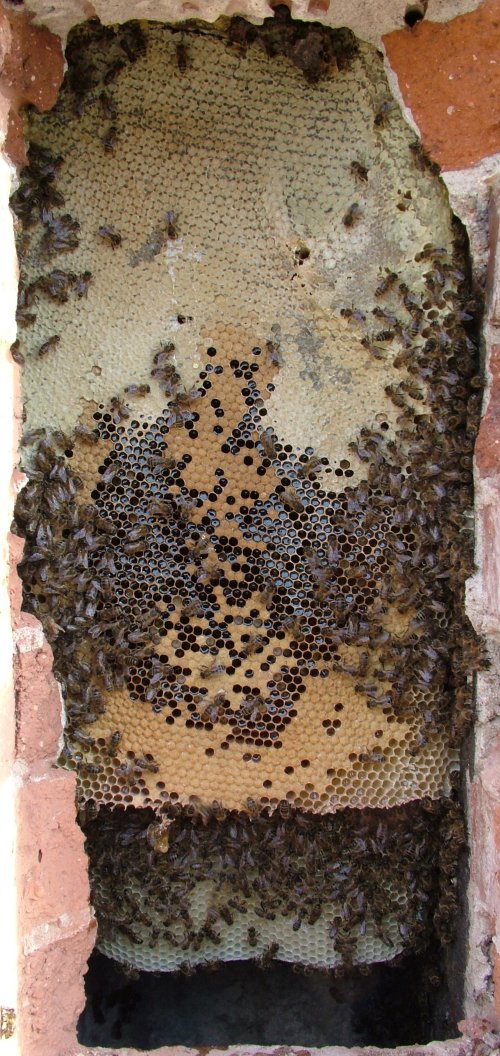
Below left: comb 2 -- capped honey is at the top; the buff
capped cells contain pupae; the dark cells contain mostly nectar or uncapped honey.
Below right: comb 6 -- the lighter area at the bottom contains eggs and larvae.
Below: All eight combs removed.
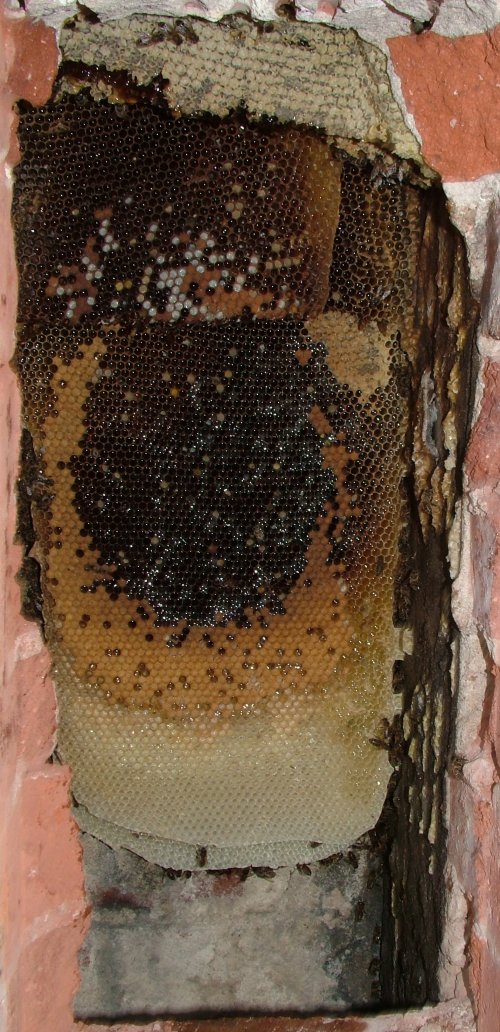
Below: View upwards from inside the flue showing the vent and underside of the chimney capping.
The distance between the midribs of the first and eighth comb was 235 mm. This gives a comb spacing of 29 mm. The cavity size was 264 mm deep, i.e. at right angles to the combs) and 255 mm wide, i.e. parallel to the combs.
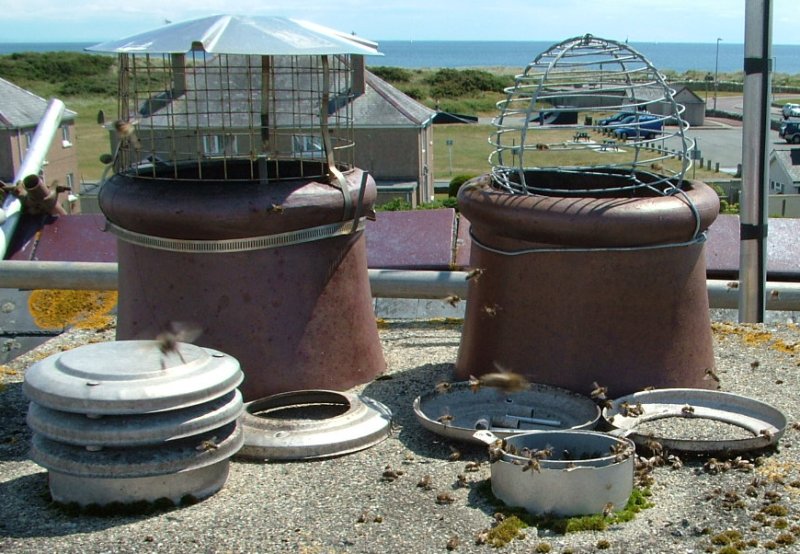
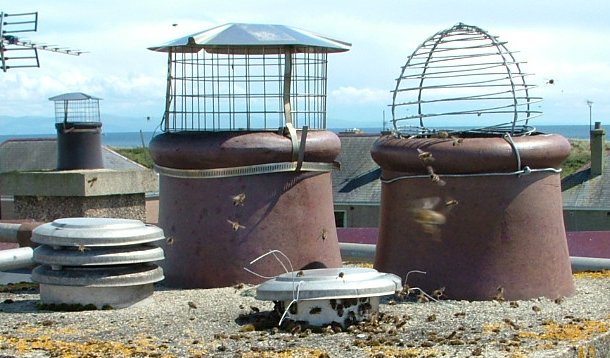
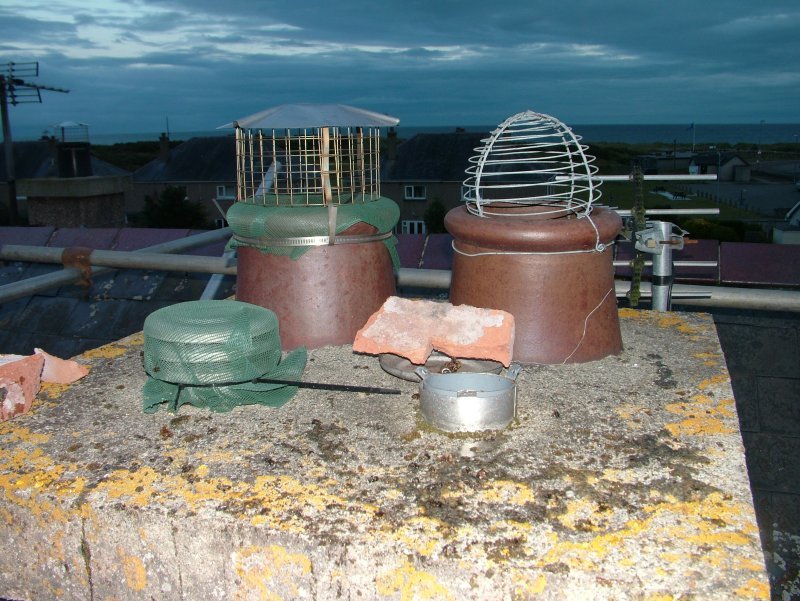
Before removal of the nest commenced, the precaution was taken to fit mesh over the two other disused flues in the chimney. This eliminated the small risk of the queen from absconding, taking many bees with her and starting a new colony in another flue.
Below: Brood combs secured in frames with rubber bands, already transferred from the nucleus box to a full sized hive brood box.
Below: Bees were shaken into the brood box from the lid of the bait hive, which is on the right. The remainder of the bees on the walls and floor of the bee vacuum were shaken and brushed with a goose wing into the brood box.
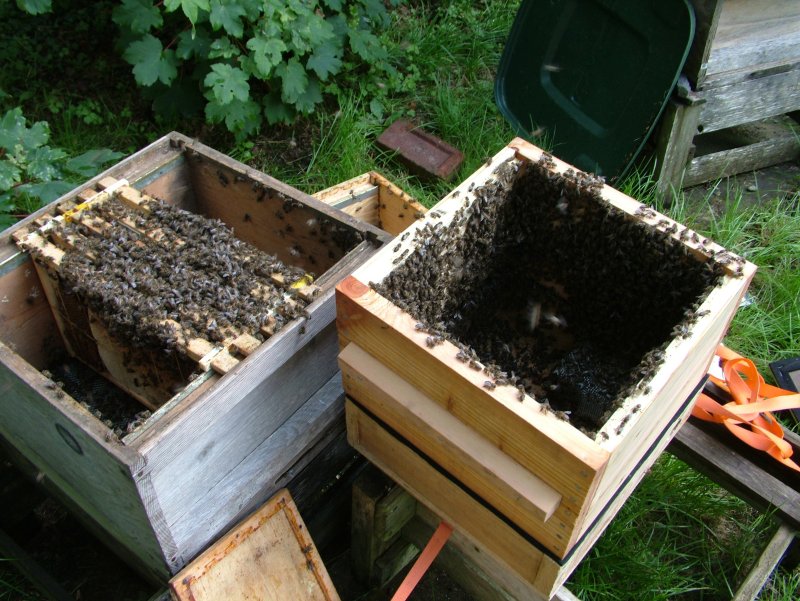
Below: Six additional frames containing some honey were added to the brood box. The 'crown board' of the hive is on the left and the empty nucleus ('nuc') box is on the right.
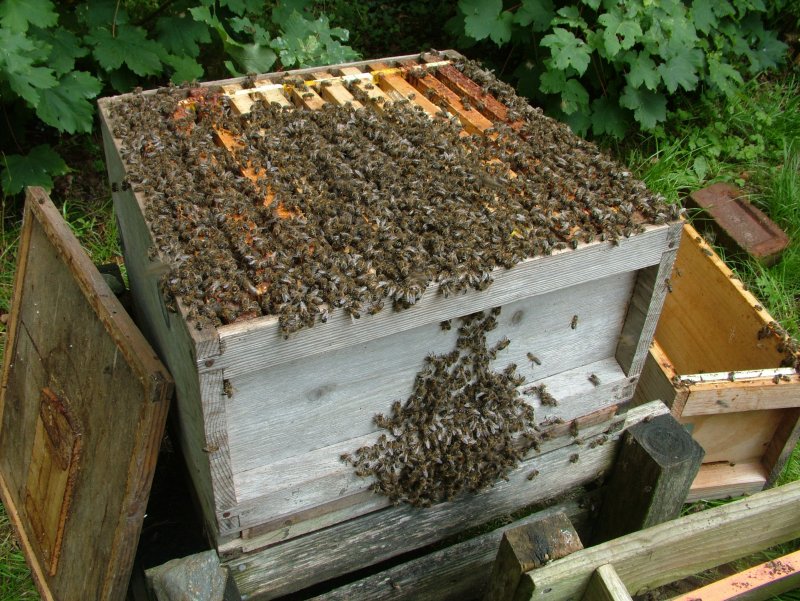
Below: The hive was closed up and the colony left to sort itself out after the trauma.
18 July 2011
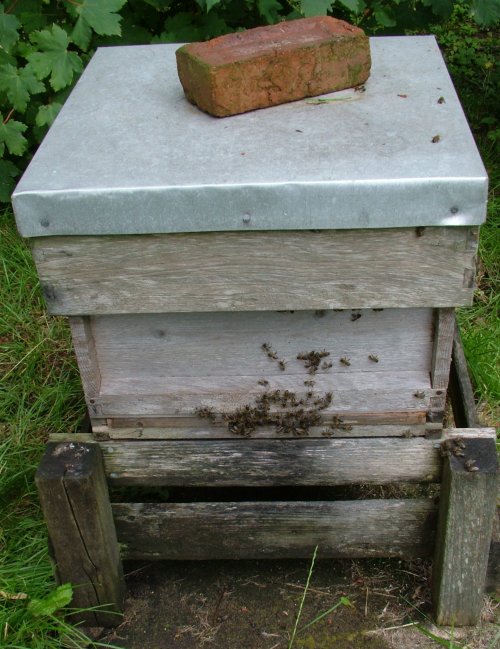
Visit to check for residual bees and replace flue capping. There were no live bees visible in the cavity, nor flying bees. The original flue cap was reassembled with cadmium plated bolts and an insect-proof. mesh inserted.
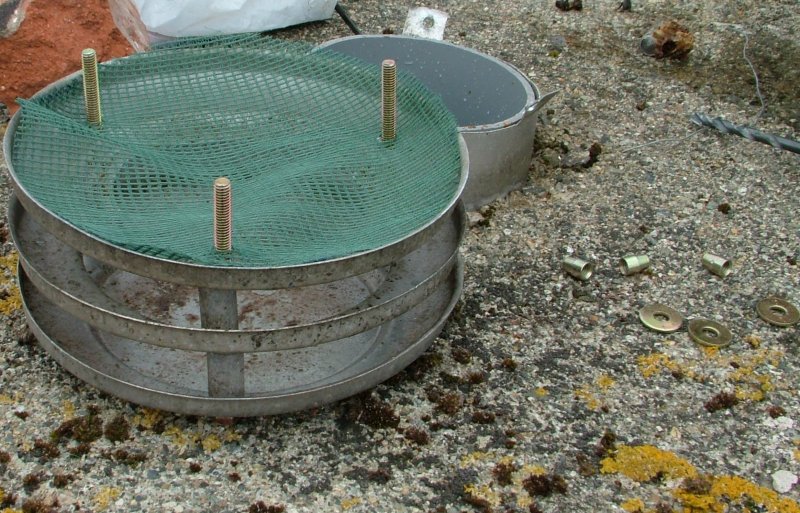
Below: The three disused flues capped and made insect proof.
Remaining task
1. Replace brickwork and re-render to match existing rendering.
2. Restore TV aerial to original position.
Notes
Options for removal
1. 'Cutout'
Removing the bees alive in a bee vacuum and cutting out the comb after cutting an opening in the side of the flue.
Example of a cutout: http://www.dheaf.plus.com/beeremovals/plasgwyn_cutout.htm
Advantages
Disadvantages
2. 'Trapout'
Fitting a bee escape to the flue and placing a hive by it ('trapout'). Example: http://www.dheaf.plus.com/beeremovals/chimney_swarm_tynewydd.htm
Advantages
Disadvantages
In this method the bees can leave the flue but not enter again. They take shelter in the hive. As a precaution the other three flues are temporarily sealed. As no water or nectar is entering the colony, the queen stops laying quite soon. The remaining brood hatches over a maximum of 24 days. More and more bees leave via the bee escape but only rarely does the queen leave too, otherwise she eventually dies along with very few remaining bees. The hive, which may or may not have been given a comb of eggs to enable the trapped out bees to raise a new queen, is removed to an apiary. The access to the flue is made insect proof. There may be a residue of honey left behind which could cause dampness as the comb naturally disintegrates. A variant of this trapout method involves removing the bee escape at a safe interval when a queen is well established in the hive and letting the hive bees rob out the honey from their former nest. This then leaves only the honeycomb, which poses no threat to the structure.
(Another variant involves placing a hive with a queen by the bee escape at the outset. The colony in the structure may be left to dwindle and die out over several weeks or can be killed with a residue-free fumigant such as carbon dioxide. The colony in the hive is then allowed to rob out the honey left in the nest in the structure.)
3. Extermination
Requesting a pest control company to destroy the colony in situ.
Advantages
Disadvantages
More information: http://www.swarmremoval.com/
David Heaf's bee removals index